

There are a number of advantages to implementing social login in your web applications. First of all, it best secures the user credentials, the user can use a single login for accessing multiple sites, this can automatically access the user details for further use, and many such. This article is about how to implement the social login with Facebook and Google using ReactJS and RESTful API. This social login helps to store social data of the logged in user into the database. So that it provides you valid user data like email, name, and others. This is a continuation of ReactJS Welcome Page with Routing Tutorial. Let’s see how this works, follow the live demo and code below.

Live Demo
Video Tutorial
Login with Facebook and Google using ReactJS and RESTful APIs
Database Design
To build the user social login system, you have to create a user table.
Users
User table contains all the users social details.
CREATE TABLE users(
user_id int AUTO_INCREMENT PRIMARY KEY,
email varchar(300),
name varchar(200),
provider varchar(50),
provider_id varchar(200),
provider_pic varchar(200),
token varchar(500));
user_id int AUTO_INCREMENT PRIMARY KEY,
email varchar(300),
name varchar(200),
provider varchar(50),
provider_id varchar(200),
provider_pic varchar(200),
token varchar(500));
You can check my previous tutorials for creating token-based API system.
Install Create-React-App
Open your terminal or command prompt and execute the following command, this will install create-react-app globally. Before that you must setup your machine with latest Node.js software.
$ sudo npm install create-react-app -g
Create and Launch a React Project
Here create-react-app command will take care the project files. Use npm start or yarn start command to launch the application.
$ create-react-app react-social-login
$ cd react-social-login
$ npm start or yarn start
$ cd react-social-login
$ npm start or yarn start
Project Launch
React project default port is 3000. Open your browser and launch the URL http://localhost:3000
React Welcome Page and Routing
Follow this React Welcome Page and Routing tutorial for setting up pages like Welcome and Home.
Social Login with Facebook and Google
Install following React plugins on your project.
$ npm install react-google-login --save
$ npm install react-facebook-login --save
$ npm install react-facebook-login --save
Create a Facebook Application
Step 1
Go to Facebook developer page and create anapplication.

Step 2
Dashboard scroll page down and choose platform as Web.

Step 3
Enter your website URL.

Step 4
It will turn on app login permissions.

Step 5
App dashboard your will find the client ID.

Step 5
In Dashboard your will

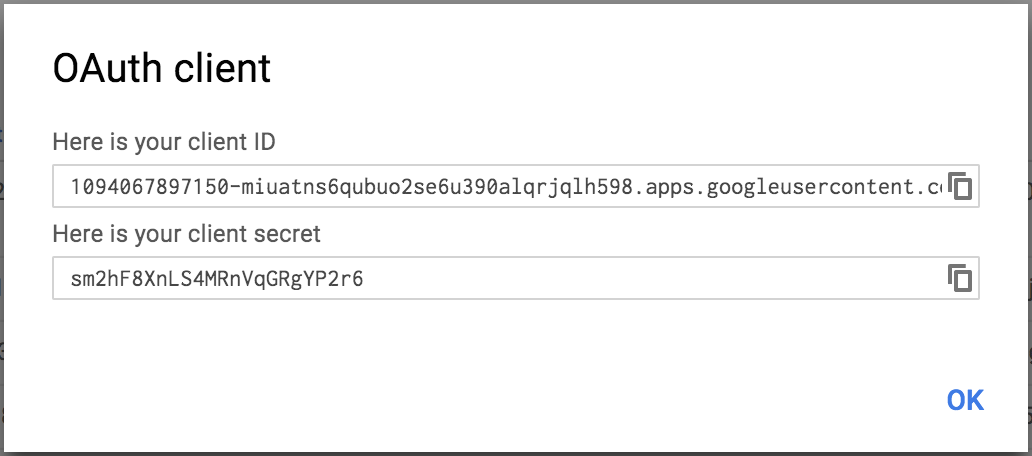
Create a Google Application
Step 1
Go to Google API Console create OAuth client ID

Step 2
Choose OAuth client ID.

Step 3
Select web application and enter your website url.

Step 4
It will generate client ID.
PostData.js
Go to your project src folder and create services directory. Create following export function for connecting REST apis.
export function PostData(type, userData) {
}
let BaseURL = 'https://apipaypal.9lessons.info/apipaypal/';
//let BaseURL = 'http://localhost/socialapi/';
return new Promise((resolve, reject) =>{
fetch(BaseURL+type, {
method: 'POST',
body: JSON.stringify(userData)
})
.then((response) => response.json())
.then((res) => {
resolve(res);
})
.catch((error) => {
reject(error);
});
});
routes.js
Page routing component, here Welcome component is the default page and * refers to 404 page.
import React from 'react';
export default Routes;
import {BrowserRouter, Route, Switch} from 'react-router-dom';
import Welcome from './components/Welcome/Welcome';
import Home from './components/Home/Home';
import NotFound from './components/NotFound/NotFound';
const Routes = () => (
<BrowserRouter >
<Switch>
<Route exact path="/" component={Welcome}/>
<Route path="/home" component={Home}/>
<Route path="*" component={NotFound}/>
</Switch>
</BrowserRouter>
);
Welcome.js
Import Facebook and Google login compoments and modify application ids. Once API connection is successful, it will store the user data in session storage and redirects to the home page.
import React, {Component} from 'react';
<FacebookLogin
export default Welcome;
import FacebookLogin from 'react-facebook-login';
import GoogleLogin from 'react-google-login';
import {PostData} from '../../services/PostData';
import {Redirect} from 'react-router-dom';
import './Welcome.css';
class Welcome extends Component {
constructor(props) {
super(props);
this.state = {
loginError: false,
redirect: false
};
this.signup = this.signup.bind(this);
}
signup(res, type) {
let postData;
if (type === 'facebook' && res.email) {
postData = {
name: res.name,
provider: type,
email: res.email,
provider_id: res.id,
token: res.accessToken,
provider_pic: res.picture.data.url
};
}
if (type === 'google' && res.w3.U3) {
postData = {
name: res.w3.ig,
provider: type,
email: res.w3.U3,
provider_id: res.El,
token: res.Zi.access_token,
provider_pic: res.w3.Paa
};
}
if (postData) {
PostData('signup', postData).then((result) => {
let responseJson = result;
sessionStorage.setItem("userData", JSON.stringify(responseJson));
this.setState({redirect: true});
});
} else {}
}
render() {
if (this.state.redirect || sessionStorage.getItem('userData')) {
return (<Redirect to={'/home'}/>)
}
const responseFacebook = (response) => {
console.log("facebook console");
console.log(response);
this.signup(response, 'facebook');
}
const responseGoogle = (response) => {
console.log("google console");
console.log(response);
this.signup(response, 'google');
}
return (
<div className="row body">
<div className="medium-12 columns">
<div className="medium-12 columns">
<h2 id="welcomeText"></h2>
<FacebookLogin
appId="Your FacebookAPP ID"
autoLoad={false}
fields="name,email,picture"
callback={responseFacebook}/>
<br/><br/>
<GoogleLogin
clientId="Your Google ID"
buttonText="Login with Google"
onSuccess={responseGoogle}
onFailure={responseGoogle}/>
</div>
</div>
</div>
);
}
}
Home.js
If user session storage data is present, using user id and token you can access other informaiton.
import React, {Component} from 'react';
export default Home;
import './Home.css';
import {Redirect} from 'react-router-dom';
class Home extends Component {
constructor(props){
super(props);
this.state = {
name:'',
redirect: false,
};
}
componentDidMount() {
let data = JSON.parse(sessionStorage.getItem('userData'));
console.log(data);
this.setState({name: data.userData.name})
}
render() {
if(!sessionStorage.getItem('userData') || this.state.redirect){
return (<Redirect to={'/'}/>)
}
return (
<div >
Welcome {this.state.name}
</div>
);
}
}
App.js
Main application root file, here you can import all the CSS framework files.
import React, { Component } from 'react';
export default App;
import './styles/foundation.min.css';
import './styles/custom.css';
import Routes from './routes';
class App extends Component {
constructor(){
super();
this.state={
appName: "Login with Facebook and Google using ReactJS and RESTful APIs",
}
}
render() {
return (
<div>
<Routes name={this.state.appName}/>
</div>
);
}
}
Protecting RESTful API from External Calls
You have to secure your API with source origin to avoid wrong post inputs.
.htacces
You can change the origin value in root level by changing *(here * referes to all sources) to your website URL. But this will apply all of your services.
RewriteEngine On
Header add Access-Control-Allow-Origin "*"
to
Header add Access-Control-Allow-Origin "http://www.yourwebsite.com"
Header add Access-Control-Allow-Headers "origin, x-requested-with, content-type"
Header add Access-Control-Allow-Methods "PUT, GET, POST, DELETE, OPTIONS"
RewriteCond %{REQUEST_FILENAME} !-f
RewriteRule ^(.*)$ index.php [QSA,L]
index.html
Included font-awesome CSS for social icons.
<?php
?>
/* ### Srinivas Tamada ### */
/* ### https://www.9lessons.info ### */
require 'config.php';
require 'Slim/Slim.php';
\Slim\Slim::registerAutoloader();
$app = new \Slim\Slim();
$app->post('/signup','signup'); /* User Signup */
$app->run();
function signup() {
$request = \Slim\Slim::getInstance()->request();
$data = json_decode($request->getBody());
$email=$data->email;
$name=$data->name;
$provider=$data->provider;
$token=$data->token;
$provider_pic=$data->provider_pic;
$provider_id=$data->provider_id;
try {
if($_SERVER['HTTP_ORIGIN'] &&
$_SERVER['HTTP_ORIGIN'] == "http://www.yourwebsite.com"){$emain_check = preg_match('~^[a-zA-Z0-9._-]+@[a-zA-Z0-9._-]+\.([a-zA-Z]{2,4})$~i', $email);
if (strlen(trim($name))>0 && strlen(trim($email))>0 && $emain_check>0 )
{
$db = getDB();
$userData = '';
$sql = "SELECT uid FROM social_users WHERE email=:email";
$stmt = $db->prepare($sql);
$stmt->bindParam("email", $email,PDO::PARAM_STR);
$stmt->execute();
$mainCount=$stmt->rowCount();
$created=time();
if($mainCount==0)
{
/*Inserting user values*/
$sql1="INSERT INTO social_users(name,email,provider, provider_id, token, provider_pic)VALUES(:name,:email,:provider, :provider_id, :token, :provider_pic)";
$stmt1 = $db->prepare($sql1);
$stmt1->bindParam("name", $name,PDO::PARAM_STR);
$stmt1->bindParam("provider_id", $provider_id,PDO::PARAM_STR);
$stmt1->bindParam("provider", $provider,PDO::PARAM_STR);
$stmt1->bindParam("email", $email,PDO::PARAM_STR);
$stmt1->bindParam("token", $token,PDO::PARAM_STR);
$stmt1->bindParam("provider_pic", $provider_pic,PDO::PARAM_STR);
$stmt1->execute();
$userData=internalUserDetails($email);
}
else{
$userData=internalUserDetails($email);
}
$db = null;
if($userData){
$userData = json_encode($userData);
echo '{"userData": ' .$userData . '}';
} else {
echo '{"error":{"text":"Enter valid data"}}';
}
}
else{
echo '{"error":{"text":"Enter valid data"}}';
}
}
else{
echo '{"error":{"text":"No access"}}';
}
}
catch(PDOException $e) {
echo '{"error":{"text":'. $e->getMessage() .'}}';
}
}
/* ### internal Username Details ### */
function internalUserDetails($input) {
try {
$db = getDB();
$sql = "SELECT uid, name, email FROM social_users WHERE email=:input";
$stmt = $db->prepare($sql);
$stmt->bindParam("input", $input,PDO::PARAM_STR);
$stmt->execute();
$usernameDetails = $stmt->fetch(PDO::FETCH_OBJ);
$usernameDetails->token = apiToken($usernameDetails->uid);
$db = null;
return $usernameDetails;
} catch(PDOException $e) {
echo '{"error":{"text":'. $e->getMessage() .'}}';
}
}


Very nice
ReplyDeletevery nice
ReplyDeleteNice sir!!
ReplyDeleteawesome post a lots of thanks
ReplyDeleteevery thing is good but how can we give size to google and facebook button or how to replace a button as we want
ReplyDeletehow to create a google client id login with localhost?
ReplyDelete