

Last few days I have been working with Amazon Web Services micro instance free tier, this post I want to explain how to setup instance, elastic IP configuration, cloud instant accessing from local computer using Putty and FTP connection. It’s awesome real cloud computing, you have complete control on server, using this we can implement new web features like node.js. Soon I’m hosting all of my demos into EC2.

Getting started with Amazon Elastic Compute Cloud(EC2)
Amazon providing 720 hours free tier micro instance box. Very first you have to create an account in Amazon.com with valid credit card and then activate micro free tie. Click here to access Amazon console dashboard.

Step 1
Go to left panel EC2 Dashboard -> NETWORK & SECURITY -> Key Pairs

Creating Key Pair - Authentication
Most important part in this installation process. Click Create Key Pair button.Step 2

Step 3
Give some key pair name. Eg:9lessons

Step 4
9lessons key pair has been created.
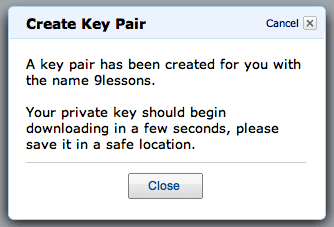
Step 5
You will get download save alert, save the .pem signature file into local directory Eg: D:/.

Step 6
Amazon EC2 dashboard will show created Key Pair and Fingerprint.

Security Groups -> Firewall
Step 7
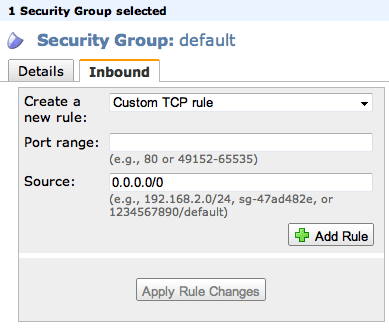
By default Amazon providing default security group, I recommend use the default firewall or you can create new security group like eg: Egglabs.

Default firewall allowed ports.

Step 8
If you want you can allow new port by adding here
Instance -> Cloud Box
Step 9
Create instance here EC2 Dashboard -> INSTANCES -> Instances

Step 10
Here you have to choose cloud server OPERATING SYSTEM.

Step 11
You can search in Community AMIs. Start icon references to free tier for Micro box users.
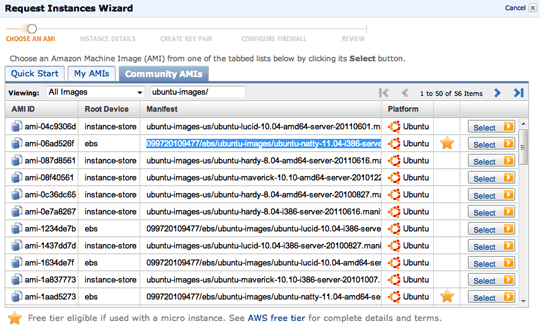
I had selected Ubuntu Natty Operating System 11.04 server.

Step 12
Instant details you can give any name.

Step 13
Now you have to choose type of instance small,medium and large. Amazon providing Micro (Free tier) 30 days

Step 14
Here you have to select 9lesson key pair by selecting Your Existing Key Pairs

Step 15
Configure firewall choose default security group.

Step 16
Now you instance cloud compute ready.

Step 17
Go to Amazon EC2 dashboard, here you can seen instance box running. You can edit the instance box name.Eg:SrinivasBox

Step 18
Right click on the running instance and click connect.

You will get connecting help alert.

Elastic IP
Amazon EC2 instance only providing public DNS name, If you reboot existing instance box the public DNS name will change, using Elastic IP we can solve this problem DNS problem it's static.Step 1
Clicking on Allocate New Address, amazon will provide you dedicated IP address.

Step 2
Choose EC2.

Step 3
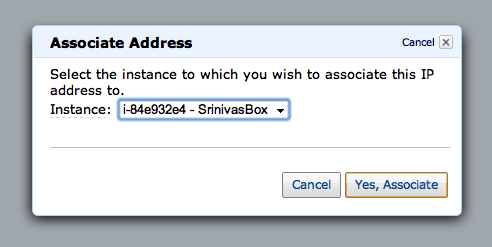
Amazon generated an IP address, now map IP address to Instance box (Eg:SrinivasBox). While clicking on Associate Address button.

Step 4
Associate instance and click YES button.
Linux connect
Executing following command in Linux terminal you can directly access your box.Windows connect using Putty
PuTTY is a free and open source terminal emulator application which can act as a client for the SSH, Telnet, rlogin, and raw TCP computing protocols and as a serial console client. Step 1
First you have to download Putty.exe and PuttyGen.ext into your PC click here and download

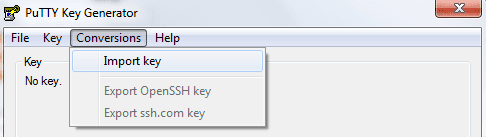
Step 2
Run PuttyGen.exe click Conversions -> Import Key.
Step 3
Choose 9lessons.pem the Key Pair.

Step 4
In Parameters select Type of Key Generate SSH-1(RSA). Click Save private key.

Same directory Puttygen will generate .ppk file (private key).

Step 5
Now run Putty.exe host name give Elastic IP or Public DNS name(If no elastic IP) and choose connection type SSH

Step 6
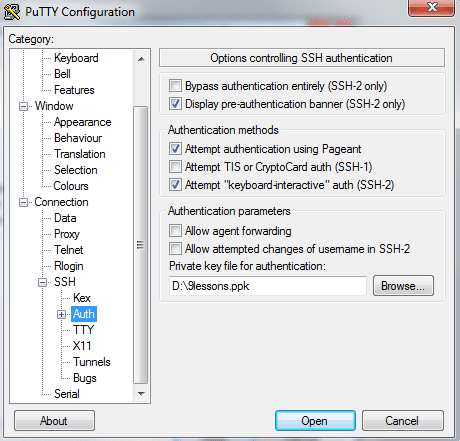
Authentication with private key.
Category -> Connection -> SSH -> Auth browse and select .ppk file the click Open button.
Step 7
Instance cloud connected successfully.

Execute following commands.
Update the Package
sudo apt-get update
Install Apache2
sudo apt-get install apache2
Install PHP5
sudo apt-get install php5
sudo apt-get install libapache2-mod-php5
sudo apt-get install libapache2-mod-php5
Install MySQL
sudo apt-get install mysql-server libapache2-mod-auth-mysql php5-mysql
Install PhpMyAdmin
sudo apt-get install phpmyadmin
Restart Apache2
sudo /etc/init.d/apache2 restart
Now your web services is ready. You can upload your files into /var/www/ directory using FTP.
Access http://ElasticIP/. It works!
FileZilla - File Uploads
Using the open source FTP tool you can upload files into Amazon EC2 instance box. Download here and install into your PC.Step 1
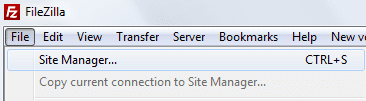
Select File-> Site Manager
Step 2
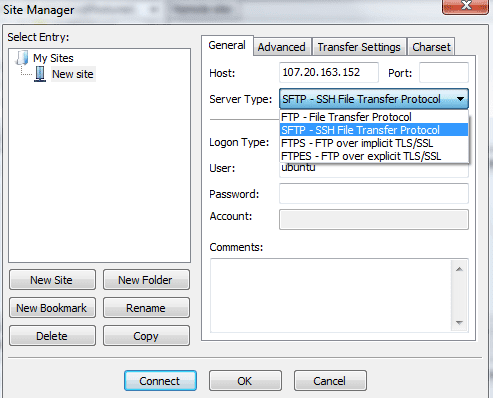
Give host name as your instance box Elastic IP and select Server Type SFTP-SSH File Transfer Protocol. Click OK not Connect
Step 3
Adding private key for instance cloud authentication. Edit -> Settings -> Connectin -> SFTP click Add keyfile button to browsed and choose existing .ppk file. Eg:9lessons.ppk


Step 4
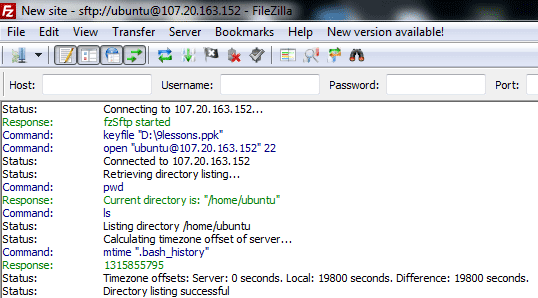
Now Got File-> Site Manager click Connect button.

Instance connected.
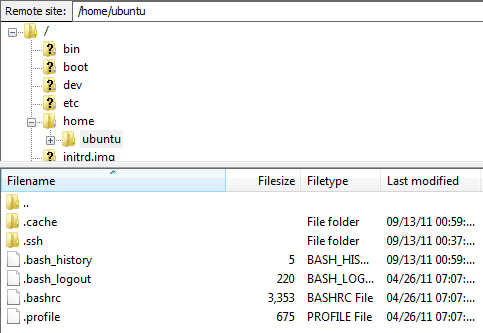
Now you can upload files from local PC to Amazon EC2 Instance Cloud /var/www/ directory.
Hope you like it. Thanks!
Srinivas Tamada


Really nice article Srinivas. I liked that attention to detail in this article. Good work. Keep it up.
ReplyDeleteThanks for sharing.
Vishal
@Vishal
ReplyDeleteThank you
Nice Work Man
ReplyDeletewhy do you use amazon web services. i'm not familiar this service. is it a standart web hosting service? why is it used?
ReplyDeleteThank you
Thanks a lot. Great Article.
ReplyDeleteNice post srinu, thank you for sharing ...
ReplyDeletevery nice Srinivas! :) can u do node.js in the future :D
ReplyDeleteThanks. good article !
ReplyDeleteExcellent !!!!
ReplyDeleteI was looking for it !!
Thanks. Good one.
ReplyDeleteGreat Srinivas :)
ReplyDeleteI am happy to see article of my choice ;)
Thanks
Hi, for some reason I can't see anything on browser, is everything setup and running ok, but when I'm try to access get an error
ReplyDeleteNice tutorial. I just wish I had it when I set up my micro instance a few months back! ;-)
ReplyDeletethanks for this post!
ReplyDeleteI did all the steps, but I couldn't get beyond
ReplyDeleteStep 6: Authentication with private key. When I click open, the cmd pops up and after sometime it says "Network Error: Connection timed out"
Any help on this?
Hi Srinivas
ReplyDeleteI have successfully setted up everything as instructed in this article but my elastic IP does not work in browser! Is there anything I will be missing here!
Thanks,
Vishal
Hi Srinivas,
ReplyDeleteJust for your reference, if anybody else encounters this. I had two issues while setting up EC2.
1. I was not able to SSH into my EC2 instance via Putty. To resolve this, I had to add Port 22 in my Security Group (Port Range field)
2. I was not able to make http request via my elastic IP. To resolve this, I had to add port 80 in my Security Group(Port range field) which fixed the issue.
Vishal
Wow... that is complete article. I'm happy to subcribe your newsletter.
ReplyDeleteI'm new to this, the lack of this article is to describe what for/final goal we rent service in amazon EC2. Is it to host file for download, to make complete hosting etc?? i hope you explain this for the future newsletter, it can easily read for entire level.
btw, can we make our hosting to host website using amazon EC2, sell reseller space etc??
Srini....Thanks a lot....This tutorial helps me, to establish the key pair ssh connection in my rackspace cloud server.
ReplyDeleteThanks Again,
Your articles are RELEVANT and VERY straight to the points.
ReplyDeleteSimple and clear , I thought setting EC2 is hard. But you made it to pieces.I gonna Share this article in my tuts blog :)
ReplyDeleteNice tutorial.. I am unable to connect.. I followed exactly mentioned in this tutorial, but still can't connect using putty
ReplyDeleteNeat post. Good job. Looking forward to more posts...
ReplyDeleteGreat post. Thank you.
ReplyDeletegood one..you covered everything..
ReplyDeletei was not able to connect into my FTP. Srinivas can you help with it.
ReplyDeleteHow many Instance EC2 , we can create FREE ?
ReplyDelete720 Hours
ReplyDelete1 instance EC2, can run 720 hours FREE per month with 10GB Space, 15 GB traffic.
ReplyDeleteBut i see, we can create many and many instance EC2 and create over 10GB Space without any alert from Amazon.
So, I don't know they will charge us or not.
But when we create more Instance EC2, they still show us Free Tier on micro :D
This is really a very useful and unique post about this topic. Saved my lot of time. Thank you very much for sharing.
ReplyDeleteWishes!!
Going to try the free version for sure :)
ReplyDeletethanks , amazing post .
ReplyDeletehow can i use my own domain name on Amazon EC2 ?
great article
ReplyDeleteTHANKS
Excellent Article Srinivas. We are planning to migrate to amazon and this would be really helpful.
ReplyDeleteReally great article Srinivas!!! Thanks a lot!
ReplyDeleteTHIS WAS SO HELPFUL.
ReplyDeleteMost documentation online has not been very clear but following these steps worked great
its great but i cannot make phpmyadmin work from browser...its killing me
ReplyDeletethis fixed the phpmyadmin problem
ReplyDeletehttp://www.noob2geek.com/linux/fix-phpmyadmin-404-error-ubuntu/
so...again..that was a great article!thnx!
I was unable to ftp to var/www. I think it needs root user. how do i connect as root?
ReplyDeleteyes truly a great help
ReplyDeletei created an instance n connected to window server 2008 through RDP using public dns. i installed tomcat, mysql, n shockwave flash plugin n run my project. when i gave the same public dns in my local browser it doesn't work. i tried it with elastic ip too.
ReplyDeletecould u pls give me some solution to this.
any sort of help is very appreciated.
@Lakshmi
ReplyDeleteSend me the error screen shots
Hi sriniwas
ReplyDeletei have already amazon connection and i also upload file in server.
but i want show frontend in url..
but i dont know url...........
what i do.....
Hello,
ReplyDeleteI am very interested in Amazon EC2.
But I do not really understand the price.
After the free year I would like if it's expensive.
And you Srinivas Tamada, how do you pay per month (or year) for your site labs.9lessons.info?
Thank you!
Hi
ReplyDeleteGreat post. Any reason for choosing Ubuntu over Amazon Linux?
Hello, we are trying to have Facebook / Twitter logins for users on our website. So they can basically use their FB/TW logins to access our website's services.
ReplyDeleteThe same implementation works on our site hosted with Godaddy.
But in case of EC2 Linux - Suse instance it does not work.
Any settings we need to do at the firewall end?
Thanks.
hi..
ReplyDeletegreat article...
Srinivas you rock...
thank you very much....
How do i login with root ? because ec2-user cannot upload to /var/www/html directory
ReplyDeleteI have problems to upload. To solve I just use this code on ssh:
ReplyDelete$ sudo chown -R ubuntu /var/www
#where ubuntu is the user
Source: http://matthom.com/archive/2011/09/01/setting-up-amazon-ec2-instances On Permission Denied Erros
And when I have all setup, I tried to access from my elastic ip but not work. Looking I just add the rule HTTP on 80 and MYSQL to my Security Group.
I must add manualy the port 80 and others because my default secure group has less ports then yours.
Source: http://www.nczonline.net/blog/2011/07/21/quick-and-dirty-spinning-up-a-new-ec2-web-server-in-five-minutes/ Create a security group (1st time only)
Thanks
Hi,
ReplyDeleteI have configured my amazon as per your instructions everything is working fine.
I just want to know that..do i need to sign up database service from amazon...?
How can i connect to mysql database...do i need to to buy a RDS...?
m trying to connect to sever via putty but its showing the error network error connection time out pls any one help me
ReplyDeleteHi,
ReplyDeleteI have followed each steps mentioned by you but both public DNS and elastic IP are not responding.
Please suggest me what to do, i am new amazon ec2.
Hi
ReplyDeleteExcellent tut.
Is this applicable to the current setting of EC@
Thomas
How can you redirect your domain to an EC2 instance?
ReplyDeleteI cannot upload files to my amazon ec2 ubuntu instance var/www/ folder with user ubuntu .. permission denied occurs.
ReplyDeletecan anyone ever had this issue plz help me/
I am having problem uploading files to my amazon ec2 ubuntu instance to the /var/www folder. permission denied.
ReplyDeletei am authorized only to upload files to /home/ubuntu folder ..
kindly help me to sort out this issue .
@ashwin
ReplyDeletechmod 777 /var/www
Hi, Is it possible to deactivate the service after some 100 hours of usage in order to avoid further billing
ReplyDeleteI have a query, is Elastic IP also free
ReplyDeleteAlso is it compulsary
Question - we have installed ec2 and can see wordrpress via ip no problem. we can also see the files in ec2 user but when we ftp in to what would be public html no file tree exists. It appears our ftp login is within the user account (at root level), not at the real "root" of the server. how do we do it at real root - goal is to see file tree?
ReplyDeletegreat article
ReplyDeleteall works except i have save problem when i log in as ubuntu
ran above command viat putty login is as ubuntu and it returned
operation not permitted
had the same problem too, tried above and it retured permission not allowed
ReplyDeletegreat post...
ReplyDeleteHey bro,
ReplyDeleteDo consider doing a video tutorial as well :) like screencast..Helps a lot of people
Keep rocking
Great post brother... Helped lot
ReplyDeleteI have followed all steps followed by you. But still i am getting Time out Error Please Help me
ReplyDeletehow to access phpMyAdmin Sir?
ReplyDeletehttp://your-ip-address/phpmyadmin/
Deletehello
ReplyDeletewhile using command sudo apt-get install php5
i am getting php5 file has no installation Candidate
Thanks Srinivas, This was really helpful.
ReplyDeletehello. this was really helpful.However i am having a problem with my server. I installed and ran phpmyadmin just fine and even created some databases. After copying files to /var/www/html folder , phpmyadmin stopped working and could not access it. i would only access the php files through postman but i cant read the database. why is this happening? please help
ReplyDelete