

There are a number of advantages to implementing social login in your web applications. First of all, it best secures the user credentials, the user can use a single login for accessing multiple sites, this can automatically access the user details for further use, and many such. This article is about how to implement the social login with Facebook and Google using Angular and RESTful API. This social login helps to store social data of the logged in user into the database, so that it provides you valid user data like email, name, and others. Let’s see how this works, follow the live demo and code below.

Live Demo
Database Design
To build the user social login system, you have to create an user table.
Users
User table contains all the users social details.
CREATE TABLE users(
user_id int AUTO_INCREMENT PRIMARY KEY,
email varchar(300),
name varchar(200),
provider varchar(50),
provider_id varchar(200),
provider_pic varchar(200),
token varchar(500));
user_id int AUTO_INCREMENT PRIMARY KEY,
email varchar(300),
name varchar(200),
provider varchar(50),
provider_id varchar(200),
provider_pic varchar(200),
token varchar(500));
You can check my previous tutorials for creating token-based API system.
Install Angular Command-line
Open your terminal or command prompt and execute the following command, this will install AngularCli globally. Before that you must setup your machine with latest Node.js software.
$ sudo npm install -g @angular/cli
Create and Launch an Angular Project
Here ng new command will take care the project files. Use ng serve command to launch the application.
$ ng new angularFirebaseProject
$ cd angularFirebaseProject
$ ng serve
$ cd angularFirebaseProject
$ ng serve
Project Launch
Angular Cli project default port is 4200. Open your browser and launch the URL http://localhost:4200
Get Started
This project requires login and home pages. Login page contains social login buttons and Home page for displaying the user details line name, email etc.
Generate Login Component
ng generating command will help you to create login component files, this will update app.module.ts all of the dependencies.
$ ng generate component login-page
installing component
create src/app/login-page/login-page.component.css
create src/app/login-page/login-page.component.html
create src/app/login-page/login-page.component.spec.ts
create src/app/login-page/login-page.component.ts
update src/app/app.module.ts
installing component
create src/app/login-page/login-page.component.css
create src/app/login-page/login-page.component.html
create src/app/login-page/login-page.component.spec.ts
create src/app/login-page/login-page.component.ts
update src/app/app.module.ts
Generate Home Component
$ ng generate component home-page
You will find all of the generated files in src folder.

Create Auth API Service
Injectable component this contains a postData function for connecting the PHP REST APIs
$ng generate service authApi
Create a services folder inside src and move newly created auth-api service files.
auth-api.service.ts
This service helps you to communicate with APIs. This funcation contains a http.post method to connect APIs and returns with promise.
import { Injectable } from '@angular/core';
}
import {Http, Headers} from '@angular/http';
//const apiUrl = "https://apipaypal.9lessons.info/apipaypal/";
const apiUrl = "http://localhost/socialapi/";
@Injectable()
export class AuthAPIService {
constructor(public http: Http) {
console.log('Hello AuthService Provider');
}
postData(credentials, type) {
return new Promise((resolve, reject) => {
const headers = new Headers();
this.http.post(apiUrl + type, JSON.stringify(credentials), {headers: headers})
.subscribe(res => {
resolve(res.json());
}, (err) => {
reject(err);
});
});
}
Create User Service
User data distribution component. This contains all the user data actions like storing user info on local storage and navigating to pages.
$ng generate service user
Create a services folder inside src and move newly created user service files.
user.service.ts
This service helps you to sharing the data with Pages. Here async and await functions are the new of writing promises. If you want use rxjs observables.
import { Injectable } from '@angular/core';
}
import { Router } from '@angular/router';
@Injectable()
export class UserService {
constructor(public router: Router) {}
async storeData(data) {
localStorage.setItem('userData', JSON.stringify(data));
const newData = await this.getData();
return this.router.navigate(['home'], newData);
}
getData() {
return JSON.parse(localStorage.getItem('userData'));
}
sessionIn() {
let A;
if (this.getData()) {
A = this.router.navigate(['home'], this.getData());
}
return A;
}
sessionOut() {
let A;
if (!this.getData()) {
A = this.router.navigate(['']);
}
return A;
}
logOut() {
localStorage.setItem('userData', '');
localStorage.clear();
return this.router.navigate(['']);
}
Social OAuth Login Implementation for Facebook and Google
Install angular-6-social-login
Install an angular social NPM project into project dependencies.
$ npm install angular-6-social-login --save
Create a Facebook Application
Step 1
Go to Facebook developer page and create anapplication.

Step 2
Dashboard scroll page down and choose platform as Web.

Step 3
Enter your website URL.

Step 4
It will turn on app login permissions.

Step 5
App dashboard your will find the client ID.

Step 5
In Dashboard your will

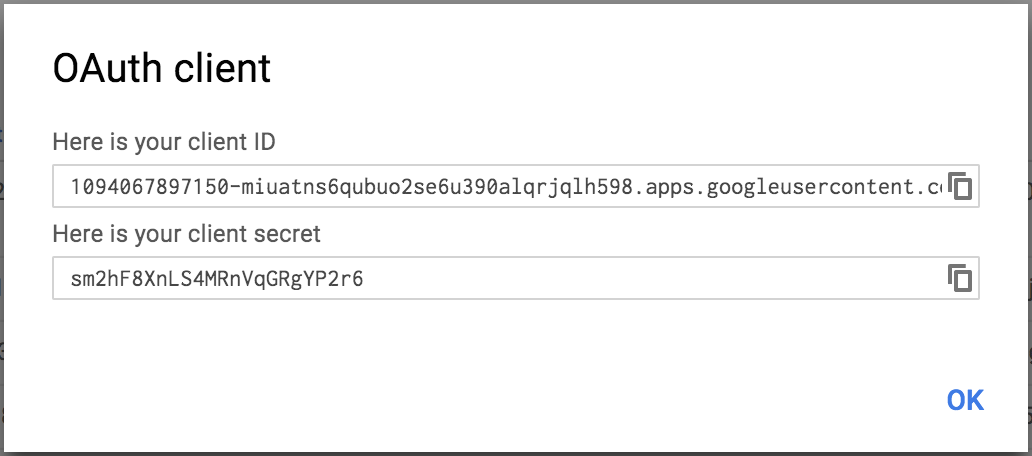
Create a Google Application
Step 1
Go to Google API Console create OAuth client ID

Step 2
Choose OAuth client ID.

Step 3
Select web application and enter your website url.

Step 4
It will generate client ID.
app.moudle.js
Import newly created modules like AuthApiService, AngularSocialLoginModule, etc. Implemented page routing with @angular/router module. For more understanding please visit my previous article Angular 4 TypeScript Google Account Email Login and Routing.
import { BrowserModule } from '@angular/platform-browser';
import { NgModule } from '@angular/core';
import { HttpModule} from '@angular/http';
import { AppComponent } from './app.component';
import { LoginPageComponent } from './login-page/login-page.component';
import { HomePageComponent } from './home-page/home-page.component';
import {
SocialLoginModule,
AuthServiceConfig,
GoogleLoginProvider,
FacebookLoginProvider
} from 'angular-6-social-login';
import { RouterModule, Routes } from '@angular/router';
import { AuthAPIService } from './services/auth-api.service';
import { UserService } from './services/user.service';
const routes: Routes = [
{ path: 'home', component: HomePageComponent },
{ path: '', component: LoginPageComponent }
];
export function getAuthServiceConfigs() {
const config = new AuthServiceConfig(
[
{
id: FacebookLoginProvider.PROVIDER_ID,
provider: new FacebookLoginProvider('Your_Facebook_Client_ID')
},
{
id: GoogleLoginProvider.PROVIDER_ID,
provider: new GoogleLoginProvider('Your_Google_Client_ID')
}
]
);
return config;
}
@NgModule({
declarations: [
AppComponent,
LoginPageComponent,
HomePageComponent
],
imports: [
BrowserModule,
SocialLoginModule, HttpModule, RouterModule.forRoot(routes)
],
providers: [ AuthAPIService, UserService, {
provide: AuthServiceConfig,
useFactory: getAuthServiceConfigs
}],
bootstrap: [AppComponent]
})
export class AppModule { }
login-page.component.js
Here socialSignin function get the user social details and post request to apiConnection. Once API call is succesful, it will return user inserted data. Using localStorage storing the user data in app level.
import { Component, OnInit } from '@angular/core';
import {
AuthService,
FacebookLoginProvider,
GoogleLoginProvider
} from 'angular-6-social-login';
import { AuthAPIService } from '../services/auth-api.service';
import { UserService } from '../services/user.service';
@Component({
selector: 'app-login-page',
templateUrl: './login-page.component.html',
styleUrls: ['./login-page.component.css']
})
export class LoginPageComponent implements OnInit {
public responseData: any;
public userPostData = {
email: '',
name: '',
provider: '',
provider_id: '',
provider_pic: '',
token: ''
};
constructor(private socialAuthService: AuthService,
public authAPIService: AuthAPIService,
public user: UserService) {
this.user.sessionIn();
}
ngOnInit() {}
public socialSignIn(socialPlatform: string) {
let socialPlatformProvider;
if (socialPlatform === 'facebook') {
socialPlatformProvider = FacebookLoginProvider.PROVIDER_ID;
} else if (socialPlatform === 'google') {
socialPlatformProvider = GoogleLoginProvider.PROVIDER_ID;
}
this.socialAuthService.signIn(socialPlatformProvider).then(userData => {
this.apiConnection(userData);
});
}
apiConnection(data) {
this.userPostData.email = data.email;
this.userPostData.name = data.name;
this.userPostData.provider = data.provider;
this.userPostData.provider_id = data.id;
this.userPostData.provider_pic = data.image;
this.userPostData.token = data.token;
this.authAPIService.postData(this.userPostData, 'signup').then(
result => {
this.responseData = result;
if (this.responseData.userData) {
this.user.storeData(this.responseData.userData);
}
},
err => {
console.log('error');
}
);
}
}
login-page.component.html
Created two buttons with click action to socialSignIn with provider value.
<button (click)="socialSignIn('facebook')" class="btn btn-social btn-facebook">
<span class="fa fa-google"></span> Sign in with Google</button>
<span class="fa fa-facebook"></span> Sign in with Facebook</button>
<button (click)="socialSignIn('google')" class="btn btn-social btn-google">
home-page.component.js
Home page check the local user data and prints, if not available it will redirect to login page. Logout function clears the local data with social data and it navigate to login page.
import { Component, OnInit } from '@angular/core';
import { UserService } from '../services/user.service';
import { AuthService } from 'angular-6-social-login';
@Component({
selector: 'app-home-page',
templateUrl: './home-page.component.html',
styleUrls: ['./home-page.component.css']
})
export class HomePageComponent implements OnInit {
public data: any;
public userData: any;
constructor(
public user: UserService,
public socialAuthService: AuthService,
public route: ActivatedRoute
) {
this.userData = this.user.getData();
}
ngOnInit() {
this.user.sessionOut();
}
logout() {
this.socialAuthService.signOut().then(data => {
this.user.logOut();
});
}
}
home-page.component.html
Printing the user data with logout button. Here the ? operator is an angular safe navigation operator, this will helps to avoid template exceptions while data binding.
<div class="userData">
</div>
<h2>Welcome {{userData?.name}}</h2>
<b>Email</b>: {{userData?.email}}
<br/>
<b>Provider</b>: {{userData?.provider}}
<br/>
<b>Token</b>: {{userData?.token}}
<br/>
<b>ID</b>: {{userData?.id}}
<br/>
<img [src]="userData?.image" *ngIf="userData?.image" />
<br/>
<br/>
<button (click)='logout()' class="btn btn-logout"><span class="fa fa-sign-out"></span> Logout</button>
Protecting RESTful API from Extrenal Calls
You have to secure your API with source origin to avoid wrong post inputs.
.htacces
You can change the origin value in root level by changing *(here * referes to all sources) to your website URL. But this will apply all of your services.
RewriteEngine On
Header add Access-Control-Allow-Origin "*"
to
Header add Access-Control-Allow-Origin "http://www.yourwebsite.com"
Header add Access-Control-Allow-Headers "origin, x-requested-with, content-type"
Header add Access-Control-Allow-Methods "PUT, GET, POST, DELETE, OPTIONS"
RewriteCond %{REQUEST_FILENAME} !-f
RewriteRule ^(.*)$ index.php [QSA,L]
index.html
Included font-awesome CSS for social icons.
<?php
?>
/* ### Srinivas Tamada ### */
/* ### https://www.9lessons.info ### */
require 'config.php';
require 'Slim/Slim.php';
\Slim\Slim::registerAutoloader();
$app = new \Slim\Slim();
$app->post('/signup','signup'); /* User Signup */
$app->run();
function signup() {
$request = \Slim\Slim::getInstance()->request();
$data = json_decode($request->getBody());
$email=$data->email;
$name=$data->name;
$provider=$data->provider;
$token=$data->token;
$provider_pic=$data->provider_pic;
$provider_id=$data->provider_id;
try {
if($_SERVER['HTTP_ORIGIN'] &&
$_SERVER['HTTP_ORIGIN'] == "http://www.yourwebsite.com"){$emain_check = preg_match('~^[a-zA-Z0-9._-]+@[a-zA-Z0-9._-]+\.([a-zA-Z]{2,4})$~i', $email);
if (strlen(trim($name))>0 && strlen(trim($email))>0 && $emain_check>0 )
{
$db = getDB();
$userData = '';
$sql = "SELECT uid FROM social_users WHERE email=:email";
$stmt = $db->prepare($sql);
$stmt->bindParam("email", $email,PDO::PARAM_STR);
$stmt->execute();
$mainCount=$stmt->rowCount();
$created=time();
if($mainCount==0)
{
/*Inserting user values*/
$sql1="INSERT INTO social_users(name,email,provider, provider_id, token, provider_pic)VALUES(:name,:email,:provider, :provider_id, :token, :provider_pic)";
$stmt1 = $db->prepare($sql1);
$stmt1->bindParam("name", $name,PDO::PARAM_STR);
$stmt1->bindParam("provider_id", $provider_id,PDO::PARAM_STR);
$stmt1->bindParam("provider", $provider,PDO::PARAM_STR);
$stmt1->bindParam("email", $email,PDO::PARAM_STR);
$stmt1->bindParam("token", $token,PDO::PARAM_STR);
$stmt1->bindParam("provider_pic", $provider_pic,PDO::PARAM_STR);
$stmt1->execute();
$userData=internalUserDetails($email);
}
else{
$userData=internalUserDetails($email);
}
$db = null;
if($userData){
$userData = json_encode($userData);
echo '{"userData": ' .$userData . '}';
} else {
echo '{"error":{"text":"Enter valid data"}}';
}
}
else{
echo '{"error":{"text":"Enter valid data"}}';
}
}
else{
echo '{"error":{"text":"No access"}}';
}
}
catch(PDOException $e) {
echo '{"error":{"text":'. $e->getMessage() .'}}';
}
}
/* ### internal Username Details ### */
function internalUserDetails($input) {
try {
$db = getDB();
$sql = "SELECT uid, name, email, provider , provider_id, provider_pic FROM social_users WHERE email=:input";
$stmt = $db->prepare($sql);
$stmt->bindParam("input", $input,PDO::PARAM_STR);
$stmt->execute();
$usernameDetails = $stmt->fetch(PDO::FETCH_OBJ);
$usernameDetails->token = apiToken($usernameDetails->uid);
$db = null;
return $usernameDetails;
} catch(PDOException $e) {
echo '{"error":{"text":'. $e->getMessage() .'}}';
}
}
Run Project
You need live hosting of testing social login.
Build Production Version
$ng build --prod
Firebase Deploy
Read more about firebase angular project deployment
$firebase deploy


The Content were very helpful .
ReplyDeleteJust a warning: this code was made using Angular, not AngularJS! They are totally different because AngularJS (up to version 1.5) has been completely refactored and is now called Angular only (without the JS at the end). Other than that, the content is very good, congratulations!
ReplyDeleteNice Article
ReplyDeleteHi Srinivas, Thank you for the post.
ReplyDeleteWhen I try facebook login from localhost
I am getting error - POST http://localhost/socialapi/signup 404 (Not Found).
When I try google login:
I am getting error - ERROR {error: "popup_closed_by_user"}
Can you please help?
Thanks,
Venkat
Hi, it works only in your original domain, wont work in your local host.....
DeleteGreat Post
ReplyDeleteif i want to get country name and phone number of the user then how can i get them
ReplyDeletegreat efforts
ReplyDeletewow sir nice post great sir
ReplyDeleteaap bahut mast jankari dete hai
gud sir
Hello sir,
ReplyDeleteThank you for sharing your experience with us.
I am glad to read your article
Hope you are enjoying the day
Hi,
ReplyDeleteI have applied your code for google login but console getting error "Failed to load resource: net::ERR_BLOCKED_BY_CLIENT". Please help to resolve this error soon.
Thanks
Awesome document
ReplyDeleteCould you please explain what does postData method in AuthAPIService does ? And also what does "apiUrl" represent ?
ReplyDeleteCould you please explain what does postdata method does ? And also what does "apiUrl" in AuthAPIService represent ?
ReplyDeleteCould you please explain how are you routing from login to home page ?
ReplyDeletePlease follow this https://www.9lessons.info/2018/09/angular-lazyload-routing-route-guards.html
DeleteI might be missing something but it looks like you don't validate the auth token on the back end at all. It's a bad idea to accept any auth token without first validating it against the provider before accepting it.
ReplyDeleteThis case we are not using the social provider token. Yes, token validation is required, if you do something else.
Delete