

Very long time back we had published few articles about custom domain email services with Google Apps Standard and Outlook.com on a Custom Domain , nowadays most of the major services are not offering free. Zoho is offering a free service with 25 email users and 5GB per user storage, I suggest you Zoho Mail Service is the best way to setup your custom domain email service. Have a look at this post and follow each and every step to signup Zoho Mail Service.
Author

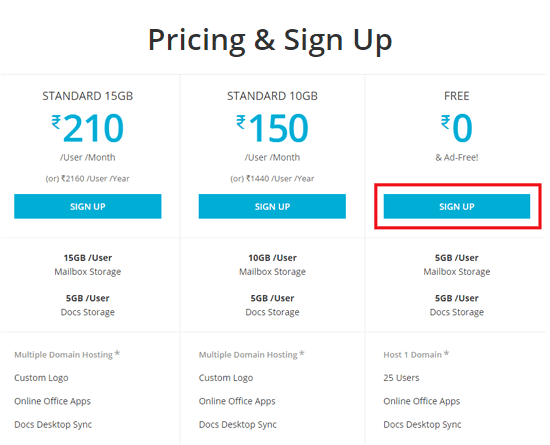
Step 1
Go to Zoho Mail Signup and select free package and click on Sign Up button.
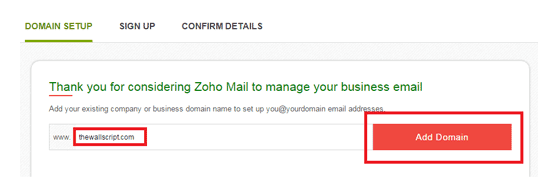
Step 2
Add your to domain here.
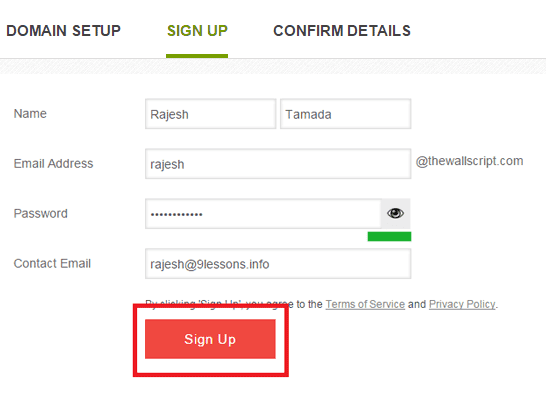
Step 3
Sing up with your details.
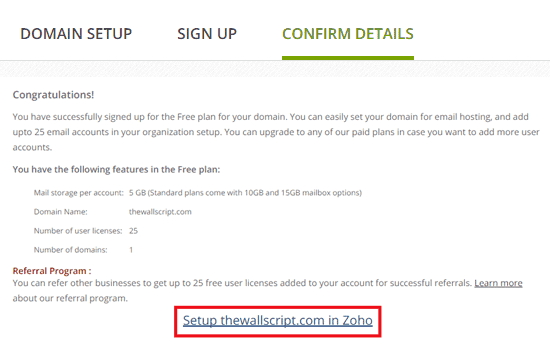
Step 4
Confirm your contact email, click on Setup yourdomain.com in ZOHO
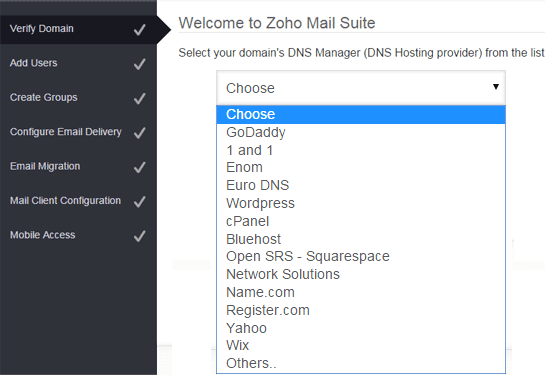
Step 5
Select your DNS service provider.
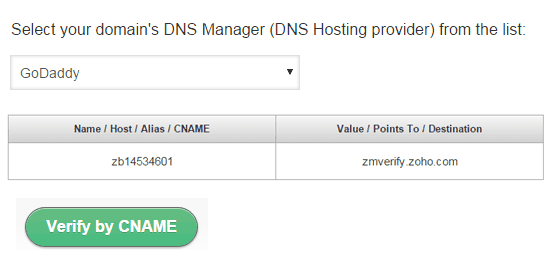
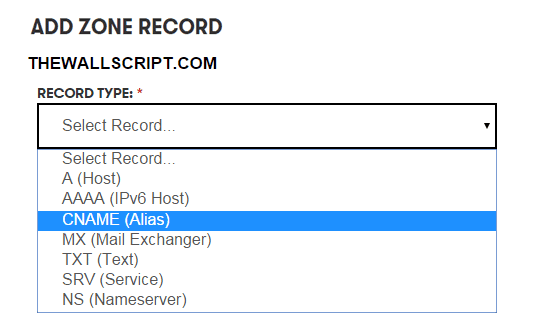
Step 6
To verify add CNAME value.
Step 7
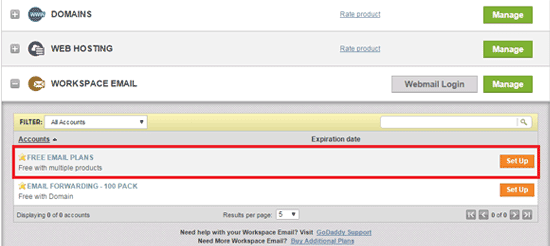
Godaddy setup
1. Login to your GoDaddy DNS Manager -> My Account
2. Setup work space email for your domain -> Click on Free Email Plan "Setup"
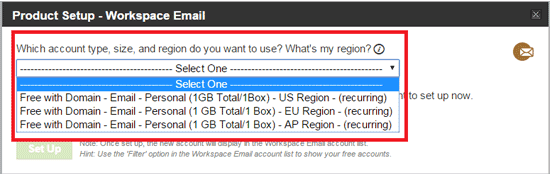
3. Select storage and region ( You can select anything you want )
Here i have selected 1GB US region-> select website(thewallscript.com)
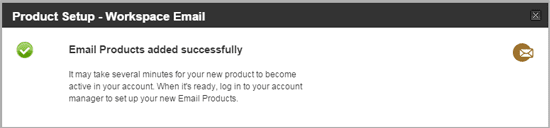
Click on Setup
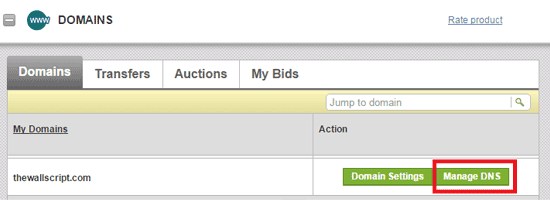
4. Update CNAME for verification - Go Daddy
Click on Manage DNS
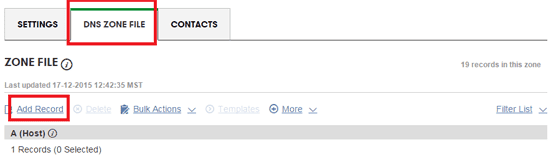
5. Click on DNS Zone file option -> Click on Add Records
6. Select CNAME
7. Enter Name / Host / Allas / CNAME and Value / Points To / Destination details, click On Finish

8. Update MX (Mail Exchanger), for more details click ZOHO MX settings
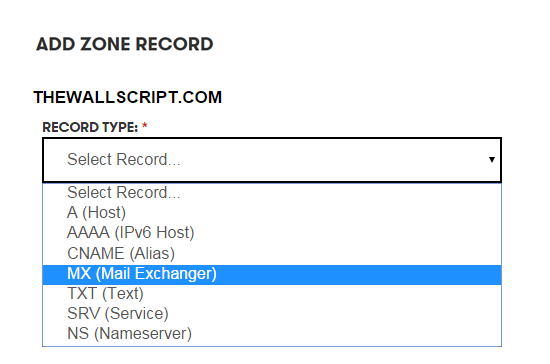
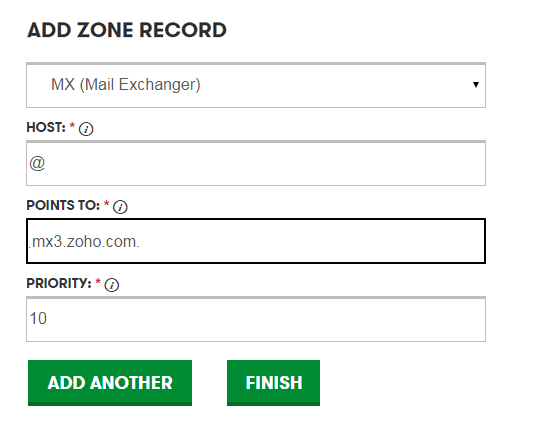
9. Create MX records with all ports, Enter MX Details for port 10
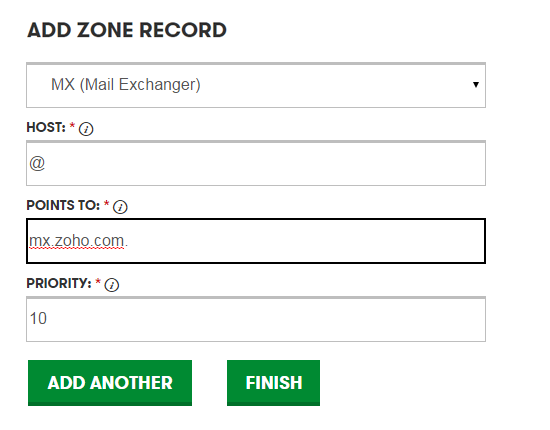
Enter MX Details for port 20

Enter MX Details for port 50
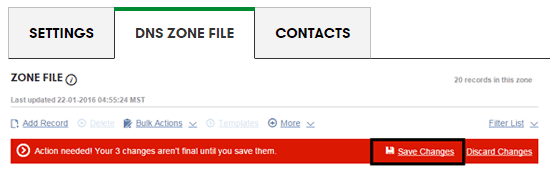
10. Save DNS settings.
Step 8
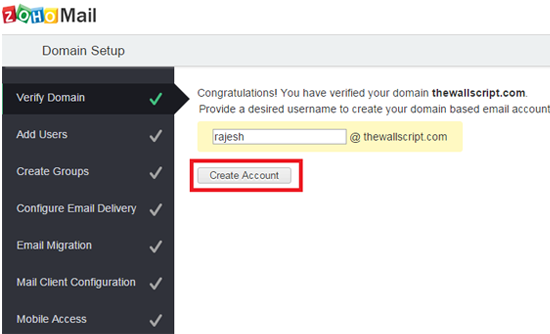
Now back to ZOHO, now you will get verification has successfully message. Now create an account.
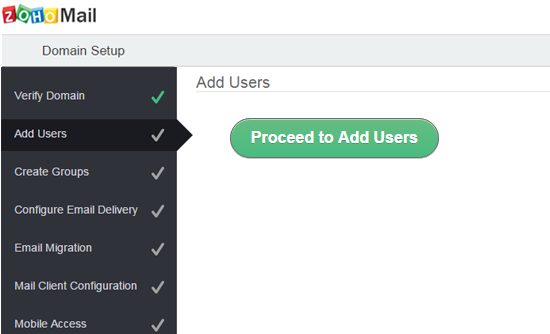
Here you can add more users "Proceed to Add Users"
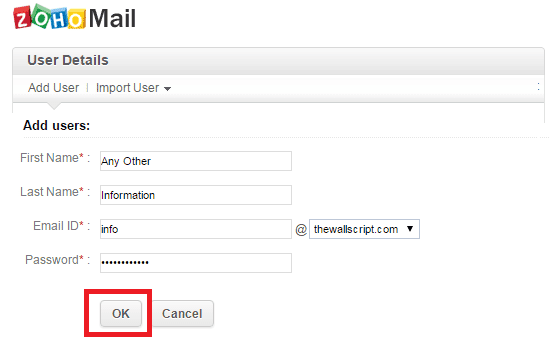
Create new user.
Step 9
Go to Zoho Mail login with your details.
Author
Step 1
Go to Zoho Mail Signup and select free package and click on Sign Up button.
Step 2
Add your to domain here.
Step 3
Sing up with your details.
Step 4
Confirm your contact email, click on Setup yourdomain.com in ZOHO
Step 5
Select your DNS service provider.
Step 6
To verify add CNAME value.
Step 7
Godaddy setup
1. Login to your GoDaddy DNS Manager -> My Account
2. Setup work space email for your domain -> Click on Free Email Plan "Setup"
3. Select storage and region ( You can select anything you want )
Here i have selected 1GB US region-> select website(thewallscript.com)
Click on Setup
4. Update CNAME for verification - Go Daddy
Click on Manage DNS
5. Click on DNS Zone file option -> Click on Add Records
6. Select CNAME
7. Enter Name / Host / Allas / CNAME and Value / Points To / Destination details, click On Finish
8. Update MX (Mail Exchanger), for more details click ZOHO MX settings
9. Create MX records with all ports, Enter MX Details for port 10
Enter MX Details for port 20
Enter MX Details for port 50
10. Save DNS settings.
Step 8
Now back to ZOHO, now you will get verification has successfully message. Now create an account.
Here you can add more users "Proceed to Add Users"
Create new user.
Step 9
Go to Zoho Mail login with your details.


thank you sir, It is very useful for new blogger.
ReplyDeletevery useful knowledge , Great job ..
ReplyDeleteThanks for the tip! Are there way to import emails from another service or imap?
ReplyDeleteThank You Rajesh..
ReplyDeleteYou have unlimited email accounts, as well as their cloud storage of 10GB per user on yandex.com for custom domains :)
ReplyDeleteUrl is: https://domain.yandex.com/domains_add/
its very useful knowledge Thanks For Share it Tamada ji...
ReplyDeleteThis is cool actually. I can use this for 1 of my blog which hasn't generating much revenue.
ReplyDeletegreat work bro...
ReplyDeleteReally good service. Is there any services like this please let me know.
ReplyDeleteThank you for sharing this ultimate information with us. This is really helpful for me to attain the domain.
ReplyDeleteThanks for sharing it is very useful for creating a new blogger.
ReplyDeleteThank goodness someone is promoting quality content.thanks for sharing that valuable information.
ReplyDeleteIt is very helpful for me.
thanks i am looking for this service from long time..
ReplyDeletethanks
I need free email that can send bulk email.
ReplyDeleteTry tinyletter.com
DeleteReally Thanks Bro it's very important for me i am looking for this service from long time I'm new blogger I want this free service thanks for sharing
ReplyDeleteIs it possible to send email by smtp from zoho.
ReplyDeleteLikw I have domain and I have registered zoho with free package. How Can I send email from my application by zoho?? Is it possible ?
Thanks, The professional email service by Zohomail is pretty useful for any one. Now I am using this this service. They provide email service both free and paid version.
ReplyDeleteThanks for sharing this great article post. Its super helpful for the noobs like me :)
ReplyDeleteHi.
ReplyDeleteThanks. I would like to implement this post. Where did you get your domain ? Any info on the fees per year?
Regards
Niandou
Hi. Thanks for sharing. Would like to implement the post. Could you advise on where to get a domain like yours? At which cost per year? Regards.
ReplyDeleteGoDaddy.com 10$ per year cost.
ReplyDelete